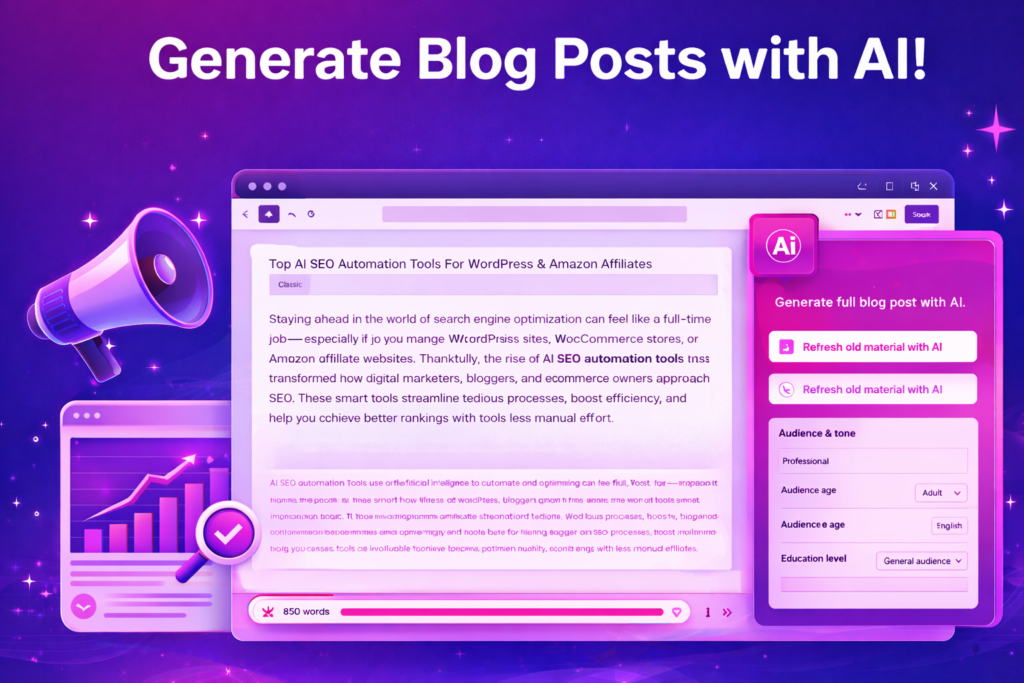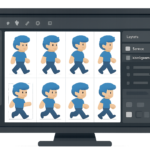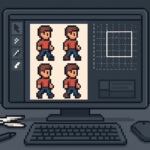


When you generate a sticker sheet with AI, you usually get one big image filled with icons. That’s perfect for previewing. But it’s not what you need for real use.
To actually ship a sticker pack (or an icon pack), you need each sticker as its own clean, transparent PNG—properly cut, properly named, and ready to upload anywhere.
That’s why we built the Skooledup Sprite Sheet Cutter (also called the Asset Cutter or Sticker Pack Cutter). It’s a browser-based tool that lets you:
- Upload a sprite sheet (or AI sticker sheet)
- Cut each icon using Box Select or Draw Select
- Clean up edges with an eraser editor
- Export the whole pack as a ZIP of transparent PNG tiles
You can use the cutter here: https://skooledup.com/sprite-cutting-tool/
The Problem: AI Sticker Sheets Don’t Come “Pack-Ready”
AI makes sticker sheets fast. However, the sheet is still one file.
So you end up doing the annoying work manually:
- Crop each icon one-by-one
- Fix halos and edge fuzz
- Re-export everything
- Rename files
- Zip the pack
That’s slow. And it’s easy to mess up.
The Sprite Sheet Cutter fixes that by turning the whole process into a simple workflow inside your browser. No heavy design software needed.
What Our Sprite Sheet Cutter Does
At its core, this tool is built for one job:
Take a sheet full of icons and split it into individual, transparent assets.
It supports the two common real-world scenarios:
- Grid-style sheets (icons lined up neatly)
- Irregular shapes (stickers that aren’t perfectly rectangular)
That’s why we included two selection modes:
- Box Select for fast rectangle cuts
- Draw Select for “scribble around it” cuts when the icon shape is irregular
Key Features (What You’ll See in the Tool)
Here’s the exact workflow our UI is built around:
Choose image
Upload your sprite sheet / sticker sheet and load it into the main canvas. (The tool is built for quick work in-browser.)
Box select
Click + drag a rectangle around an icon. Release, and it becomes a tile. This is perfect for aligned icons, UI assets, and clean grids.
Draw select
Scribble around an icon. Release, and the tool cuts the selection as a tile. This is ideal for sticker-style art where a simple rectangle would grab too much background.
Tiles panel
Every selection you make becomes a tile below. You can keep adding tiles as you work, and you can build an entire pack from multiple cuts.
Remove sheet (keep tiles)
This is one of the most useful features when you’re building a full pack.
You can load a sheet, cut tiles, then remove the sheet from the workspace while keeping your tiles. That way you can upload a new sheet and keep building the same pack.
Clear tiles
Want to restart? Clear the tile list instantly.
Pack title (optional)
This becomes part of the ZIP name, which makes your exports easy to organize.
Save pack (ZIP)
When you’re done, export all tiles as a ZIP of transparent PNGs. One click. One download.
Edit Tile Edges (The “Clean Cut” Secret)
Most cutters stop at “crop and export.”
We didn’t.
Sticker packs usually need cleanup. Even with great AI art, you’ll sometimes see:
- Tiny background scraps
- Edge fuzz
- Random pixels near the border
- Overlap from a neighboring sticker
So we built a tile editor:
Drag a tile into the editor
Click a tile card (or drag it onto the editor). Now you’re editing that tile only.
Erase edges
Drag your mouse over the tile to erase edges. The eraser removes alpha only, so you keep clean transparency.
Remove edits
If you go too far, Remove edits restores the tile to its original cut.
Apply (live)
Edits apply directly to the tile canvas, so what you see is what exports.
Step-by-Step: From AI Sticker Sheet → Finished Sticker Pack
Use this exact flow every time:
Step 1: Open the cutter
Go to the tool page and log in if prompted.
Step 2: Upload your sticker sheet
Click Choose image and load your sheet.
Step 3: Cut stickers into tiles
- Use Box select for simple rectangular icons
- Use Draw select for sticker shapes and irregular edges
Each cut becomes a tile automatically.
Step 4: Clean up edges (optional but recommended)
Click a tile to load it into the editor.
Erase any junk pixels or edge fuzz.
If needed, hit Remove edits to undo.
Step 5: Name your pack
Set a Pack title (optional), so the ZIP exports with a clean filename.
Step 6: Export as a ZIP
Click Save pack (ZIP) and download your complete sticker pack.
What You Can Use the Exported Sticker Pack For
Once you export, you have individual transparent PNGs. That means you can immediately use them for:
- Sticker packs for communities (Discord-style sticker sets)
- UI icon packs for apps and websites
- Stream overlays, alerts, and badges
- Game assets (sprites, items, UI elements)
- Digital products (icon bundles, sticker bundles, design kits)
- Branding packs (logos, marks, variations)
Basically, anywhere you need clean, separated assets.
Why Ours Is Better Than “Generic” Sprite Cutters
A lot of sprite cutters assume everything is a perfect grid.
Real sticker sheets aren’t like that.
Our cutter is built for modern creator workflows:
- Freehand Draw Select for irregular icons
- Tile edge eraser for professional cleanup
- Remove sheet, keep tiles so you can build a pack across multiple sheets
- ZIP export so you’re not downloading one file at a time
Try the Skooledup Sprite Sheet Cutter
If you’re creating sticker sheets with AI, this tool is the missing step that turns “a cool sheet” into an actual ready-to-use sticker pack.
Open the tool here and cut your first pack in minutes: