

WordPress plugins are essential tools that enhance your website’s functionality and performance. However, many users find installing and activating plugins challenging at first. Fortunately, this guide will walk you through how to install and activate WordPress plugins quickly and efficiently.
Whether you want to add SEO features, improve security, or customize your site design, plugins make it possible. AI Posts, AI SEO & AI Analytics By SKP | Skooledup.com offers plenty of resources to help you get started with WordPress plugins.
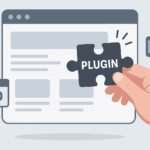
What Are WordPress Plugins?
First, it’s important to understand what plugins are. In other words, plugins are pieces of software that add specific features or functionality to your WordPress website. For example, you can install a contact form plugin to collect visitor messages or an SEO plugin to optimize your content for search engines.
Because of this, plugins enable you to customize your site without coding knowledge. Moreover, there are thousands of free and premium plugins available in the WordPress repository and other marketplaces.
How to Install WordPress Plugins
Now, let’s dive into the installation process. You can install plugins using three main methods: through the WordPress dashboard, by uploading a plugin file, or via FTP. Below, we explain each method step-by-step.
1. Installing Plugins via the WordPress Dashboard
This is the easiest and most common way to install plugins. To make this easier, follow these steps:
- Log in to your WordPress admin area.
- Navigate to Plugins > Add New in the left sidebar.
- Use the search bar to find the plugin you want by name or keyword.
- Once you find the plugin, click Install Now.
- After installation, click Activate to enable the plugin on your site.
At the same time, you can view plugin details, ratings, and reviews before installing to ensure it meets your needs.
2. Installing Plugins by Uploading a ZIP File
If you have purchased a premium plugin or downloaded one from a third-party site, you’ll usually get a ZIP file. To install it:
- Go to Plugins > Add New in your dashboard.
- Click the Upload Plugin button at the top.
- Choose the ZIP file from your computer and click Install Now.
- Once installed, click Activate Plugin.
This method is helpful when the plugin isn’t available in the official repository.
3. Installing Plugins via FTP
For advanced users, installing plugins via FTP gives more control. However, it requires an FTP client like FileZilla and access to your server.
Here’s how to do it:
- Download and unzip the plugin folder on your computer.
- Connect to your website’s server using your FTP client.
- Navigate to
/wp-content/plugins/directory. - Upload the unzipped plugin folder here.
- Go to your WordPress admin dashboard and activate the plugin under Plugins > Installed Plugins.
This method is useful if your dashboard upload option is disabled or for troubleshooting plugin issues.
How to Activate WordPress Plugins
After installing a plugin, you need to activate it to start using its features. Fortunately, activation is simple. Usually, you can activate the plugin immediately after installation by clicking Activate.
Alternatively, if you installed the plugin via FTP or manually, activate it by:
- Going to Plugins > Installed Plugins in your dashboard.
- Finding the plugin in the list.
- Clicking the Activate link below the plugin name.
Once activated, some plugins may require additional setup or configuration. Check the plugin’s documentation or settings page for guidance.
Tips for Managing WordPress Plugins
To maintain a healthy website, managing your plugins properly is crucial. For example:
- Keep plugins updated: Updates often include security patches and new features.
- Delete unused plugins: Inactive plugins can pose security risks.
- Check compatibility: Before installing, ensure the plugin works with your WordPress version.
- Backup your site: Always backup before installing or updating plugins to prevent data loss.
By following these tips, you can optimize your site’s performance and security.
Conclusion
In summary, knowing how to install and activate WordPress plugins is essential for customizing your website effectively. Whether you use the dashboard, upload a ZIP file, or FTP method, the process is straightforward when you follow the right steps.
Moreover, managing your plugins properly ensures your site remains secure and runs smoothly. For more WordPress tips and tutorials, visit AI Posts, AI SEO & AI Analytics By SKP | Skooledup.com to explore our expert resources.
Start installing and activating plugins today to unlock the full potential of your WordPress site!